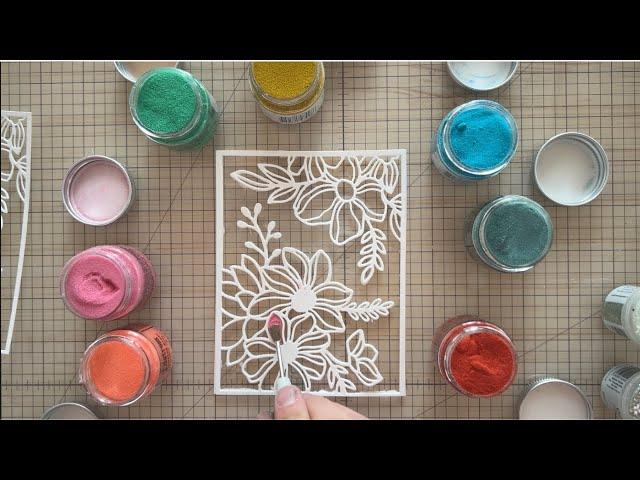
I've NEVER seen this technique before!
Комментарии:

I too have never seen this technique. It's very cool and pretty.
Ответить
Too sloppy. Too much high and lows in coloration. Maybe use emboss ink and ink pen first to get even powder layer and repeat application in layers ?
Ответить
I do not like the adds. Will watch different crafters.
Ответить
What glue did you use to stick the acetate to the card please? Great card, thank you for sharing.
Ответить
On your score/cutting board - cut with your paper aligned at the top, score with your paper aligned at the bottom.
Ответить
Thank you, Justine! This is amazing! I watched her video too and it is also gorgeous. I will definitely try this!!
Ответить
Oh mercy, don't sneeze. What about putting a piece of cardstock on top so that the heat gun won't blow the powder. Just enough so that the top of the powder hardens.
Ответить
That technique looks so awesome. What a great way to use up all that different colors of embossing powders that I never ever use anymore thank you so much for sharing that idea with all of us.
Ответить
That is so beautiful.
Ответить
What does Pam NOT know??? I was today years old when I learned this. Love it!!! 😂😂😂😂
Ответить
It's just amazing 🤩
Ответить
No joke! How lucky
Ответить
What patience you have!
Ответить
Great new way to use different colored embossing powders. I cannot wait to try this! Also I saw your powder spill and was amazed how well you did that! Hats off to you and your trained embossing powder.
Ответить
Funny that this came up as I have been thinking about doing stained glass effect christmas cards, my idea is to use acetate, lay it over a picture such as a christmas tree, penguin, snowman etc, then use actual stained glass paints and that outlining paint to draw in the lines before painting in the picture. Your idea is another way of doing it that I hadn't thought of.
Ответить
Great video, thank you so much.
Ответить
I have a smaller spoon, which will work great for this. I will try an oven to melt the powder so there is less blowout. Great job!
Ответить
A trick I learned on a very early Tim Holtz cd-rom ( around 2007?) was to use alcohol inl to colour clear embossing powder. I just put a small teaspoon of clear embossing powder in a small plastic container, like he ones you et medicine in at hospitals, then drop alcohol ink (just a drop or two!) on the embossing poder, stir w a wooden stick or similar and then let it dry nd there you have great tansparent embossing powder in the colour of your choice! Much less expensive than buying many different colours ( if you have alcohol in and clear embossing powder of course!).
Ответить
What adhesive did you use to attach the die cuts to the acetate?
Ответить
I signed up for your 12 Days of Christmas but never received an email. But I also can not get an email to go through at the address in your sign up. PLEASE HELP.
Ответить
Thanks for showing us this video! Can’t wait to try it out! 😊
Ответить
link to laura is not a hyper link
Ответить
Please, please, please don’t use the term ‘I’m gonna go ahead and. . .’ so frequently. It’s so very distracting. Just a constructive comment. 😊
Ответить
Curious, what type of glue did you use to keep this attached to the acetate? I find when I try to glue on acetate, It does not stay permenantly.
Ответить
Use the bottom of the trimmer when you score and it will score the whole paper.
Ответить
Awesome, thank you 🤓
Ответить
Great idea and video! I also am surprised I was not too late to get the discount on Craftsy membership and jumped on it, as well as an offer from them to upgrade for 6 dollars! Can't wait to start my first class! Thank you thank you thank you!!
Ответить
I just love listening to you. So does my hubby. He falls right to sleep to your soothing voice.
Ответить
Really neat ⚾️
Ответить
Your descriptions and explanations are so clear and friendly, but just one suggestion: replay and count the number of times you say "go ahead" in a sentence.
Ответить
Wow this is fantastic. Thank you for sharing.
Ответить
I think the uneven background makes it look like older stain glass, before the industrialization of glass making smoothed the color.
Gosh! I just pitched a Spellbinders’s VSH tape. It was when they only made brass stencils and you would glue glitter into the little areas to create a similar look. Going to check out Laura’s video now. Thanks for sharing.

To hear the powder without blowing it around, put it under the grill or in the oven. You need to keep a close eye on it as it doesn't take long if you've pre-heated it but it's great when your not using an embossing ink or anything.
If you're doing a lot it's also quicker than having to move the heat gun around to all the areas.

Cool! I had hoped you would held the card in front of the window to show the stained glass effect
Ответить
Wow, such a cool idea. I am guessing it would have a better stained glass look if you used some silver leaf on the top layer before gluing it on. Oh the ideas this inspires, especially for Christmas, Mothers day, Easter, etc. Maybe make the stained glass removable from the card to enjoy as a suncatcher. <---Count me inspired! ❤😊
Ответить
Such a beautiful technique!! 😍
Ответить
What is Laura’s channel?
Ответить
So beautiful! Thank you, Justine for sharing another inspiring and creative video. ❤
Ответить
What about the embossing ink?
Ответить
So how did you make the embossing powder stick? Versamark? You didn’t say
Ответить
Hi! Turn your paper cutter *upside down (so that the scorer doesn't follow the (orange) cutter, and your score will go all the way across!
. . . . .OR you can slip the cutting cartridge out TEMPORARILY (as if to put-in a new one/blade), then place it back in the (slide), after scoring! All the Fiskers are like this -- mine too! -- and I have used the *interchangeable cartridges/blades in this way since Day 1 (<< 25yrs. ago)!😉

😊
Ответить
This is beautiful
Ответить
pretty!
Ответить
Why don’t you just use glass paints?
Ответить
Completely stunning card, and huge thanks for all your helpful top tips too xx
Ответить
Lovely 💞
Ответить
Just gonna go ahead. 😅
Ответить


