How to install UCA's and Coilovers on a Toyota Tacoma in 14 min
Комментарии:

Is it normal the OEM control arm to be so stiff and not freely moving up and down like the aftermarket arms?
Ответить
Is this the same install/removal for camburg uca?
Ответить
the sawzall was my best friend when i did mine
Ответить
i like how he thinks everyone can find their 10mm
Ответить
I wanna come down there and tie you to a fucking chair and force you to listen to me draggin nails across a chalk board. Evey goddamn time you drag a wrench off that table o wanna do that
Ответить
Are the install instructions the same for a 3d gen?
Ответить
So much easier when you have a lift..
Ответить
Sees all tools required googled prices, calls nearest mechanic shop.
Ответить
Wonderful tutorial install. But no way its in 14 mins. Haha
Ответить
Standard Nuts and Bolts... I was wondering why in the tool presentation.. Nothing worse than fixing a vehicle with non spec bolts and nuts..
Ответить
You drags dont chase the threads for zero fittings after powdercoat
Ответить
Do you guy fabricate upper/lower control arms for the GM S-10/blazer platform?
Ответить
Great video. I just wish everything came off and on my truck as easy as it did with this new truck in the video.
Ответить
What’s the install time for both sides?
Ответить
you guys are fucking lame not assembling them already...way to cut corners.
Ответить
Shocking is not easy
Ответить
Bro just put the tools in the description. Pro tipthanks for the video. Good stuff
Ответить
He installed the lower bolt to the lower shock mount backwards. When you really do some a real assembly work you'll notice how hard it is to turn the nut when it's backward. 🤔
Ответить
Second note it is whole lot easier assembly when you cut the bolt for the upper control arm. Instead of having to play with the body panel.
Ответить
This vehicle they worked on didn't have heavily wired areas. Where he disassembled the upper control arm 🔩.
Ответить
On top of everything no loctite was used oh my God.
Ответить
I know just enough now to attempt this, great video!
Ответить
👍😀🇵🇷🚘P.R.
Ответить
Today I attempted to install a Fox 2.0 lift kit in my garage and it is not as easy as this guy makes it look.. I was able to do an AAL install plus rear shock install. Once I got to the front I started it but every bolt seemed to not want to come out of its stinking hole. Then I said screw this and started putting everything back together and all the bolts didn’t want to go back into there stinking holes! WTF! maybe I’ll just have a shop do the front..
Ответить
FANTASTIC VIDEO!!!
Ответить
Is the ball joints durability stronger than the original and is its life span longer or not? As well as are affected by water and dust?
Ответить
Excellent tutorial, 👍🏻👍🏻👍🏻💪🏻🏁
Ответить
Do you have any advice on what uca to get if u only want 1.5 of lift with either bilsteins or foxs ...i know spc are adjustable but I cant rely on the dealership or any garages around here to do anything other then a lazy mans alignment .i want it to be perfect ..is thete a certain degree of castwr etc per inch of lift? In yout experience jave u done any 1.5 inch lift and if so which uca was best for a simply install
Ответить
Exactly the video I was looking for.
Ответить
If anyone thinks it's this easy to install UCAs on a 3rd gen... It's not. There's significantly less room for the bolt. You have to bend and/or cut the fender liner. Installing the bolt backwards doesn't work either because the solid brake lines get in the way
Ответить
The … lift
Ответить
My 2007 Tacoma pre-runner 2wd has a mass of sheet metal on the passenger side stopping the bolt. bending the sheet metal like that does nothing. Even tried using a pry bar between the sheet metal and frame and wouldn't budge. Going to have to cut the bolt.
Ответить
dont you torque after you have weight on the assembly, not while it it is hanging?
Ответить
Glad to find out it only takes 14 minutes per wheel. (lol)
Ответить
Easy to do when everything is brand new. Obviously these were already changed before.
Ответить
Problem is finding someone to do a proper alignment on that modified suspension
Ответить
great video
Ответить
Hah. What sway bar....
Ответить
The castle nut on my 2016 TRD Off Road was a 24mm.
Ответить
Less than a 1/2 job.... on my 2012 taco
Ответить
Yes I can see why you didn’t show the passenger UCA bolt removal that was a pain!!
Ответить
Where can I buy replacement tapered adapters? I have a 05 style Tacoma?
Ответить
Its not this easy to remove the UCA bolt
Ответить
This took me 2 days not 14 minutes
Ответить
Great. It bugs me you have to bend the metal flange to clear the axis bolt.
Ответить
Thanks for the video it was a big help in my install on my taco!!
One thing I'd like to point out, especially on the earlier 1st gen taco's is that you need a ball joint press to eliminate the ball balljoint from the control arm as "hitting it out" with a hammer will crack.
And i was using a jack in the drive way as not everybody is fortunate to use a lift.
But other then that hands down agreed the best explanation of how to swap over the UCA's and install the coilovers.
You do NOT need the sway bar what so ever as the coilovers are perfect and there is barely any "body roll" like others state in some forms!
Hats off to yah!! 🤘

Do uniballs last longer than ball joints?
Ответить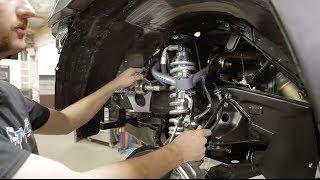


![GTA 5 - НОВЫЕ УЛИКИ! ЗАГАДОЧНОЕ УБИЙСТВО. 4 ЗАЦЕПКИ (Пасхалка) [Easter Eggs] GTA 5 - НОВЫЕ УЛИКИ! ЗАГАДОЧНОЕ УБИЙСТВО. 4 ЗАЦЕПКИ (Пасхалка) [Easter Eggs]](https://smotrel.cc/img/upload/UVhrQUN1TG96V2g.jpg)
