Комментарии:

Figuring out what you are going to do half way into a build is a foundational issue not an interprocess issue. It does however make for a more common real world scenario where initial planning did not account for moderate interference.
Ответить
i love these kind of builds. im build a 1990 mazda b series 4x4 pickup right now. its using a 1992 toyota pickup frame, a 1984 toyota solid axle, and a 1991 volkswagen diesel engine to power it all haha! nothing fits together, so im machining and fabricating my own parts. i built my own bellhousing adapter, designed and modified the mazda flywheel to use on the volkswagen crankshaft haha! its been a massive project, but im really enjoying it so far! keep running into weird issues, but its part of the game!
Ответить
Just mentioning , i came here for welding i have no interest in cars (gasp shock horror ! ) i miss the welding video,s !
Ответить
Because of you and your two part video on narrowing an 8.8 , I had the knowledge to do the job correctly . It turned out perfect and I saved a lot of $ . Thanks for sharing .
Ответить
Have you thought about just z ing the frame?
Ответить
Justin, isn’t totally bad news.
If you must to remake all the front suspension from scratch, is a great opportunity to re measure the caster angles, and the ackermann geometry, and so..
I’m not and expert, but I can help you with some calculation if you want.
Have a good one!

Remember Nanny the Goat says "Safety Second" always.
Ответить
Awesome video as always.
In regards to the rear proportioning valve, can you explain your thought process in keeping it? Lowering the truck doesn't equate to the truck being under a load, but will still result in the rear bias when unloaded. Or did you do something to mitigate this?

Your use of tool and the things u build I am getting more and more .... wanting to watch the next video
Ответить
Your perserverance will be rewarded mate👍
Ответить
Just put a taller lower bump stop there.
Ответить
Well Justin, you taught me tube bending and pie cuts. Those skills let me swap a 'Buick' 225 V6 into a 1948 Willys CJ2L (not A) Jeep in place of the factory L134 flat head four-banger. It's a common swap, but what I learned from you was how to do it without making it permanent - I could swap back to the Go-Devil motor at any time because I was able to make it a completely bolt-in job.
What specifically made it possible was fabricating a pair of double-Y headers. Typically with this swap, you have to remove the factory motor mounts so yo have clearance to run the drivers side exhaust manifold reversed - dumping out the front, so you can run a full passenger side exhaust without crazy fabrication.
So thanks! just let me know where to drop a pic of the parts!

Hey, can you move the lower control arm mount to the top of the frame and fab new upper mounts? You'd probably also need modified struts, but is this possible?
I'm also wondering if I can use a Watts link setup on my 48 Willys jeep for off-roading instead of a panhard rod. It's an overlanding build, not a rock crawler, using one in the rear shouldn't be an issue if I can mount it right. One in the front would be far more difficult, so a panhard rod might be the best bet there.

Good job guys
Ответить
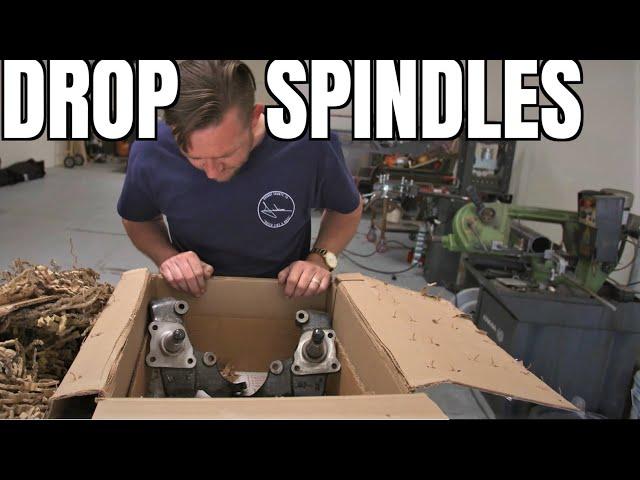
I put 2" drop spindles on my 2005 chevy tahoe...worst suspension mod I did to that vehicle. Couldn't get the camber into alignment...only got it close with upper control arm offset bushings. I am going to be putting stock spindles back on, removing the torsion bars, and converting to front coil overs.
Ответить
Are you swapping to bolt in high misalignment uniballs? They could take the angle and not snap. Since you are already fabricating all new anyway.
Ответить
Love your work!
Ответить
Why our the proportioning valve in the rear, if your not going to hook it up? I mounted the one from my rabbit truck in the cab on the rear firewall. I use allthread to make it more adjustable. Worked out great.
Ответить
JUSTIN, I have a question that I am hoping you can help me with.... A fella pulled out in front of me in my 84' K-10, Hit so hard that it bent the right front frame horn, leaf Spring Shackle, and the cross-member.... I have a Everlast MTS lightning 275.... Is there anyway I can send you pics to get your opinion on repairing it?? I noticed you said you use duct bills.... I own an HVAC Co. here in East Tennessee(Knoxville area) and if you need anything related to my line of work, I got you brother.... You have helped me in more ways than I can count, You taught me how to weld, without even knowing it.... LOL ....
Ответить
Keep in mind remaking the mounts for the front suspension will help with bump steer. That extreme angle they have right now will throw you all over the road if any bumps or dips come your way
Ответить
Great welding and metal works tips. go elsewhere for suspension, chassis, engineering aspects, just saying.
Ответить
Not an air bag guy more along the lines of hot rods but why not z the frame or do a body drop? I have leaned a lot of very useful things from your videos. I like your attitude.
Ответить
Just a thought here, can't you just cut the control arm mounts off and move their attachment point to get the proper KPI/SAI? Raise the lower mounting point an inch and raise the upper mounting point an inch and a half-two inches for your desired effect. Maybe you'll just have to make your lower control arm so your bag mounts will be how you want them
Ответить
Just put your stock spindles back on upside down, problem solved!! Or just fabricate new spindles? Again, problem solved!! Did someone say uniballs?
Ответить
You are a talker well so am I , I love talking about and Building cars , bikes , trailers and metal shaping machines , I have a small shop and just love it . I was thinking can I borrow you mate there I need some help , I'm just around the corner I'm in Queensland Australia ask him if he wants to come ? All so I love your tec tips
Ответить
What about “Z” ing the front frame? Has to be done to fully layout a Tacoma.
Could make a drop member like has become popular with C10s.

NiCopp tubing for new lines...thank me later. So much easier and most of the bennies of stainless (not all).
What is the Prop valve you are using? Thought I heard you say it's a weight-sensing valve in an earlier video? Deleting the ABS on my Danger Ranger Overland build (old tech and terrible function)...that idea sounds intriguing to me as my load will vary a lot.

What do u need a e brake cable when u can park it on the ground?
Ответить
What if you fab the mount for the upper arm a bit higher? Should give you the bit of travel needed and less stress on the ball joint as well. I think anyways lol
Ответить
Murphy gets you every time....and he'll be lurking there until the project is licensed and on the road. Been there... done that.
Ответить
To make the proportional valve active, you could link it to the airbag pressure. The higher the pressure, the more weight you have in the back, therefore the more brake force that you can bias toward the back. Not sure what you would use, but I’m sure there is a spring return pressure sensitive switch/ram etc that would be suitable, and you just need to hook it into the rear bag circuit.
Ответить
Time is a commidity, as they say.
Ответить
I’m glad you make safety a priority. Do the job right the first time. For whatever time it would take to do the job
Ответить
Lowering is such an alien concept for us 4x4 peeps 😂
Ответить
Great job Justin! Like always loving the videos! Any chance I could commission you to make some tubular control arms for my 00 S10?
Ответить
It always takes longer and cost more than you thought on customer jobs we learn to factor in the what iffs
Ответить
Thanks for all the building tips and tricks that help me to scratch out my living!
😉 😊 love your work man!

Just do what the mustang 2 guys and first gen Tacoma guys do. Do a radius arm delete and convert the lower into a traditional A arm. A bushing, roughly a foot and half of 1.5 inch bent tube and some new bushing brackets in line with the stock pivot bolt.
For the upper, you can do what the low rider guys do and cut then re-angle the upper ball joint then box it in for strength. Or use it as a template for a tubular arm.
Then to get it lower, figure out how much lower the front needs to be by measuring the engine x-member plus about a half inch and do a frame Z.
This all would be much more labor intensive than just gutting the front end and slapping on a mustang 2 front end.
A few trucks out there aren't able to be air bagged very easily and a mighty max is one of them.

As much as that stinks that you have to rebuild the whole front end, I am really excited to see how you do it. These past few videos have been tremendously helpful and I can’t wait to see what you do next and continue to learn
Ответить
using that prybar to open a box. "this may be overkill"
"overkill is underrated"

I ended up buying an AHP alpha TIG 201 after your unboxing. It's been working great and I am nearly through my first bottle of Argon with it :).
Ответить
i posted this comment at 4:20 am
Ответить
My 9 year old and I lay in bed in the mornings and watch your channel. He loves to watch you weld, then try it out on my cheap flux core welder.
Ответить
When I started watching these I was really interested but as the build progressed I became rather disappointed in how the build as going... lets see what the end product looks like (if it gets finished?)
Ответить
Binding control arm ball joints. Looks like your tire/wheel diameter is too big for the suspension layout.
Ответить
Justin Superstar,,, yaayyy ;-)
Ответить
i can't be the only one to notice that you called the sway bar, a strut rod. that truck looks like a dual A arm suspension truck. they don't have strut rods.
Ответить
I bought the 2 1/2" years back and in the rear I did a under the axle perch mounts to drop it 3'' best thing I did drove great and stopped mint since the front spindles had groves and calipers would stick Sketchy stopping boy LOL
Ответить
being a fab shop, old school ( 80s ) we would cut the lower control arm, weld in flat stock, couple gussets, reset the alignment with full suspension travel and geometry
Ответить