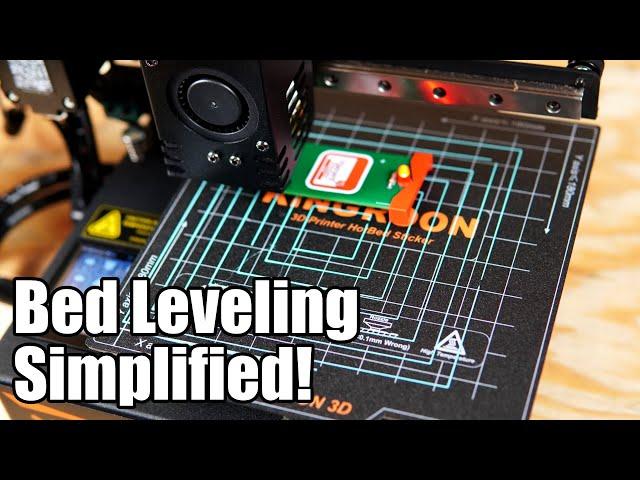
Take The Guesswork Out Of Leveling Your 3d Printer
Комментарии:

Great video !!! Does the E-Leveler work on all the Kingroon KP3S series of printers ?
Ответить
I bought one off Amazon for 20$ and I measured it at 5.4mm when the button is pressed enough for the light to just come on, I set my z off set to 5.4 and when it auto homes it's already way to low to slide the leveler under, is it because I have a built in auto level sensor on my printer? (Aquila x3)
Ответить
Do I have to mess with my Z offset still?
Ответить
Professional Firmware makes this so easy; using the BL touch to probe each corner to then show on screen wich knob to turn such that the bed is properly level. It then can create the bed mesh and that's it; a level bed and no extra equipment required. But this little contraption sure is useful for printers without BL touch or that require manual leveling, since Professional Firmware isn't available for all printers as far as I know.
Ответить
I know it's a minor point and probably VERY petty of me but I am SO glad that you called it a "tactile"switch instead of a "tactical" switch which I hear hear far to often.
Ответить
How do you determine the offset needed? I've been using the paper test in the middle after running the e leveler but that does not seem to be accurate.
Ответить
I bought the the leveler but was immediately disappointed upon discovering the clip or lip to retain battery was missing entirely. I broke down the packaging completely to ensure it wasn’t hiding somewhere. No luck
Ответить
Seems like a great idea that is successful, but I have to wonder about slight variations on the sourced tactile switches. Not all batches engage at the same distance. Plus the accuracy from the button on the pcb an the "foot" at the other end that is 3d printed can vary. The travel distance of the tactile switch also will change the angle of the board itself, causing a slope. How is this corrected for? Is there a version for longer/wider print heads such as the Sprite Pro? How does it affect printers with an ABL sensor?
Ответить
I have a Printrbot Plus 2.1. It seems to have an odd size bed compared to most current FDM machines. Can this tool be used to level my bed?
Ответить
Will this work for doing mesh bed leveling
Ответить
I have gotten used to the paper method, but you can't escape a warped printing bed :3
So now I just bed level it with my eyes xD I bring it just close enough that it doesn't drag on the bed. It's not for everyone, but it works for me ¯\_(ツ)_/¯ (for anyone that cares, yes I tried printing on glass, it's not a fun time getting things removed though ...So I got myself a flex plate (or whatever it's called) and I'm never gonna change it with anything else!)

I've got a Chuck's leveling tool. I've felt no need to use it. When my Voxelab Aquila comes out of level (or I feel like I want to level it based upon how a print turns out), I gravitate to the paper + 5 points method and do that like 5 times and then do a level test. I understand that my PEI flex bed isn't 100% flat and I compensate for that when leveling. Nothing can help level a really bad bed, not even Chuck's tool.
Ответить
I appreciate Chucks effort, but $25... Maybe it's an inspiration to make one yourself with a battery, resistor and a LED?
Ответить
This feels like a solution looking for a problem. It's far more complicated than manual levelling.
Ответить
I keep seeing the hanger on you wall and thinking that's a water droplet on my screen
Ответить
Bed leveling sensor is the best thing a 3d printer must have. It´s a must in every single new printer. Ender 3 owners know this very well.
Ответить
I’ve had a few good prints but not consistent. I’ve done BL touch which I don’t like. Leveling is what has caused me not to touch my printer for over a year now
Ответить
I have been using pronterface to manually control my printer and level the bed with a feeler gauge. I may look into adjusting chucks gcode for use with a feeler gauge.
Ответить
I'm also in the feeler gauge crowd. You can't beat the "feel" of metal-on-metal.
There will be manufacturing tolerances on the thickness of the PCB, differences in the distance the switch is soldered from the PCB, then repeatability of the switch itself (it will activate at a difference pressure each time). All this needs to be taken into account when tramming.
I'm not dumping on his project, just people need to be aware that this method will not be as accurate.

Hi Modbot, unrequested advice but you might want to add a short PTFE tubing on the input of your extruder, after few hours of printing mine started to be file by the filament.
That said thanks for your tutorials

Friday I got my ender 5 pro it wasn't any problem putting it together but it took me till Sunday afternoon to finally get my first successful print ( dog ) So I would like to ask besides the leveler here what would you recommend for a beginner what to purchase for my 5 Pro ? and thanks in advance
Ответить
Cheaper method: metal gauge instead of paper and a multimeter set on continuity test.
Ответить
Thanks for the great tutorial, but man, the image on your build plate hurts my brain.
Ответить
How’s this accurate? Paper is much smaller and closer to the bed than using this which is much thicker… much much thicker or higher. Would this not throw it off?
Ответить
At first, I was doing the paper method and got confused on how much the friction it should be. I then considered buy this one but the shipment cost is pretty high (I'm in SE Asia.).
Then I made a clone using an IC board an a few components. It works pretty well. It doesn't look as well made as Chuck's though.
Later on I learned that I can use the built-in leveller to do this. All I need is to flash a new Merlin firmware in. The stock one can only probe the bed, but doesn't assist the traming.
Now I'm a happy Ender 3 S1 user with the professional firmware :).

Well I am self taught and kind of like stuff to be hard....
...So hard that I got a ender 3 2 years ago and got a CR-10 shortly after. I added a micro Swiss all metal hot end and an enclosure and printed ABS using a business card for my leveling tool. (( im picky on what cards I use for leveling a bed. ))

Where to buy in UK, it's not on the uk Amazon site ?
Ответить
too complected , get yellow hard springs and be done with it
Ответить
It can be said that is a bit pricey for what you get but it is its innovation, convenience and simplicity of it that give it value for money. Chep has and does do a lot for the 3D printing community for free so I think he deserves some recompense. I just wish it was on Amazon UK the postage does push it above my budget.
Ответить
Nope!! First video of yours I have watched I did not like. Hate to say that, you are great, but a hard no to Chucks "leveling tool".
Ответить
Chuck's instrument is only available in the US😒
Ответить
all i got to say is ...auto bed leveler!!
Ответить
Mine work great but the red piece was kinda loose. In my panic to level the bed it fell off several times. I use painters ta but am contemplating a drop of super glue. Thank you for stating a way to increase the time allowed. He has stated or made a video that you can change it on some printers you can make it stop at each corner until you are done and click to move it to the next corner. Thank you for your videos.
Ответить
Thank you Modbot and thank you Chep for this awesome tool👏
Ответить
I can't see how it helps level the bed when you look at the big amount of gap it has between it and the bed when leveling? there must be at least a 8 to 10 mm gap there.
You would to need to do a big z off set of that amount to have a leveled bed or it would just be floating above the bed by that 8 or 10 mm gap.
So good idea but really can't see having that gap helps.
As for bed leveling the old way so to speak I had a hell of a time doing the 1st 3D printer I got a 2020 model of a Tronxy X5SA.. the bed being 330 mm square with 6 adjustment screws was to say the least impossible to level. Yes it states it has a auto leveling system, But the original blue sensor they did was a waste of time as it detects only the steel metal base under the bed cover which it's self was thick aluminium so was not picked up be the magnetic sensor. I spent many hours trying to do auto leveling and the manual version all with not luck even doing the z off set was a pain.
I in the process of fitting the Tronxy with a 3D Touch so I can use the printer after it been left sitting for 3 years.
Later on I got a Aquila and being a smaller bed was a bit easier to level, it now has a C R Touch there as I even had issues sometimes leveling it well?
Now I have also a FL SUN Delta QQ-S Pro with a good auto level probe you attach only as needed.
I just last week managed to order in a pre-launch video by Elegoo one of the upcoming Elegoo Neptune 3 FDM Printers. it was on sale and will cost me less than my Aquila did.
This has full auto advanced Stain Gage leveling head system. so it be a dream.
Hopefully later some time I wish to get the new Elegoo Saturn 3 Resin Printer that was just launched on the video last Saturday where I ordered the Neptune 3 FDM printer.

Why not use a dial indicator ?
Ответить
Chuck is awesome. I got the "Kit" Chuck put out first in where you have to put the leveler together yourself and have not used it yet becaus,e as you say, I'm ok with my feeler gauge /paper system I use. I got the leveler system to mainly support Chuckles :) Thanks for all you great work in our community
Ответить
lol. I kept trying to clean my screen but the marks were on your wall in the background.
Ответить
My CR10 v3 has the worst bed I've ever seen. No leveling method works because the surface is like waves on the ocean. Any suggestions of how to get a level surface?
Ответить
I have G34 in my start code to level the gantry then Autobim is run from within Octoprint to assist me in manually levelling the bed and then the bed is probed in a 5X5 mesh before the print is started, subsequent prints are done with the bed mesh for about 8 prints and then I use the levelling profile again, sometimes I level the bed with the paper method and then use Autobim to see how accurate I am, I can level the bed to where I think it is perfect and a couple of times I have got it bang on but the majority of the time I am slightly out
Ответить
25$ for about 1$ of components is just not realistic - also depending on the quality of the tactile switch the button press offset is neither constant nor particularly accurate (still accurate enough for a normal 3D printer but still varying quite a bit)
Ответить
I use a feeler gauge and manually move the nozzle to each corner. Sometimes I go to print and find that something changes and the bed is off. The majority of the time it's the motored dual z kit, the right side skips steps for whatever reason and I'll have to take a ruler and double check that the x is parallel to the frame on both sides.
Ответить
I like it, but I have a hard time justifying $25 for one. :/ Even for the diy kit, it's $12 from his site + $8 USA shipping. however you still need to get a battery and solder it. I think the additional couple $ from Amazon would be worth the time saved + not needing to source a battery. But $25 is too much. I'd pay $15 shipped (USA) for the kit. But that's about it. :/
Ответить
I have this same printer
Ответить
@Kersey Fabrications got me to use feeler gauges to do my leveling/tramming. It is combined with an EZABL from TH3D. However last week I purchased one of these units to try and get better results. Thanks for the video.
Ответить
Excellent video, good sir! 👍
Ответить
Best summary of E-Leveler yet. Great video!
Ответить
After using this leveling tool, you still have to correct the Z offset right? I just recently purchased an ender 3 s1 pro and I'm having quite a bit of trouble getting first layer adhesion even with the cr touch bed leveler. I'll manually level each corner with paper but then the center of the build plate won't be correct. Any tips would be greatly appreciated!
Ответить


