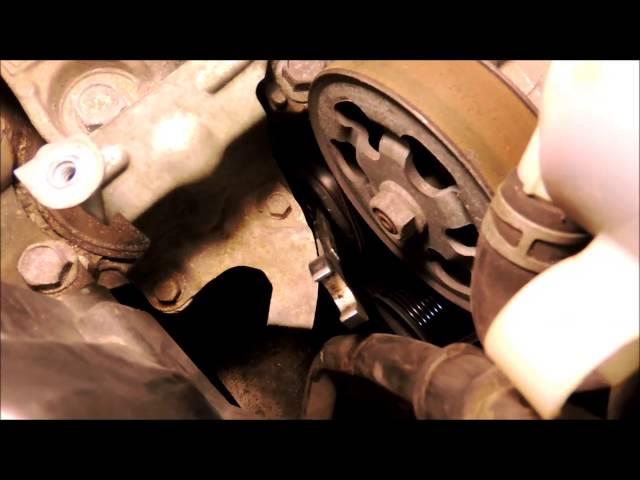
Honda CR-V Serpentine Belt Installation 2007 - 2011 in a half hour with no special tools
Комментарии:

Cool video… thank you dude…
Ответить
Comin' in clutch with the ratchet trick! Thank you my man!
Ответить
Using a 1/2" racket wrench as adjustable leverage is perfect. Thanks.
Ответить
This is the best video out there in how to do this.
I shopped Amazon for my Compressor, Drier/Desiccant and related a/c parts (OEM Sanden Kit from Buy Auto Parts # 60-83466RN; $285); and Serpentine Belt (OEM specs Bando # 7PIC1745; $18). I started this morning and finished this afternoon using your video, limited tools and "Shade Tree Mechanic" skills.
Drier and compressor were easily accessible from bottom of the front shroud, and belt went on smoothly from the top. I don't understand people who take apart more of the car than they need to, or who struggle with things like this, or who give up and say "have a dealer do it right."
These are DIY projects, and videos like yours give excellent guidance for novices like me. It's dealer quality and after I convert my old Wards air compressor into a vacuum pump, I'll use my new Amazon double gauges to evacuate and charge this 2011 Honda CRV with 134a - (plan B was to use "rent" these tools from Advance Auto).
I don't know what a shop would charge me for this, but I do know that the dealer charges over $60 for the belt alone. I'll be done with this for well under $400. What ever happened to the America I grew up in, where people were gutsy enough to fix things themselves? Thanks for helping me and all of those out there who think we can do anything if we only try.

I did not know about that wrench and ratchet combination thank you 🙏.
Ответить
Dude 1/2 inch on the 14 legendary status! Thanks
Ответить
Hey man thank you so much! This worked with your technique.
Ответить
Excellent instructional video. My experience was not as easy as others. My new belt was quite stiff, and had bends from being in the packaging. Things that I did differently, after first following the video instructions, without success. To gain a bit more access I removed the bracket for the power steering reservoir. Once I had the belt around all of the lower pulleys including the alternator, I placed a piece of folded cardboard (8x8 in) between the pulleys and the inner fender. Since I was working alone, I used a ratchet strap hooked to a point in front of the vehicle, to pull the wrenches on the tensioner to hold it open. I brought all of the slack to the front side of the power steering pulley, and caught the edge holding down with my hand. I then used a 19 mm socket to rotate the ps pulley counter clockwise and it pulled the belt right around the pulley!
Ответить
THANK YOU KIND SIR! YOUR KNOWLEDGE HAS HELPED ME SO MUCH.
Ответить
Ive watched a few of these how to videos and this was one of the best~ GREAT JOB! Im about to attempt to change the belt.
Ответить
Thank you, your video helped me change my belt for the first time.
Ответить
My man, i spent like 30 minutes trying to use a 14 mm and another bigger wrench for leverage. I soon i saw your video, and i said Hallelujah!!!
I was able to put back the belt over the pulley under one minute. Im so grateful for your video. Thanks again, amigo!!!!

Thank you great explanation!!! 👍 👏 👏 👏 As a women learning cars and saving money I come to you tube and learn and one thing I like is someone who knows their stuff. Your explanation is spot on it really easy to watch ur videos Big Thank you . Catey
Ответить
Wrong belt moron
Ответить
just thank you
Ответить
Excellent tutorial, thanks (from France).
Ответить
When putting the belt on, I strongly suggest you guys grab someone else. They can hold the tensioner open while you route the last part of the belt. Doesn't have to be an adult, I small child can hold it long enough for you to route the belt.
Also I personally route everything except one of the last pulleys towards the bottom of the car, then have someone hold the tensioner and I go underneath and easily route the last part of the belt. Don't see people do it this way, I suggest you to at least consider it if you get into a jam.

perfect video. Thanks
Ответить
Excellent! Thank you!
Ответить
The combo wrench and ratchet is a great idea. To remove the CRV drive belt you need a bent bar [like the Honda Tool] otherwise with a traditional long straight bar you run out of real estate quick and can't release enough tension.
Ответить
Cut the old one off so you only have to wrangle the tensioner once. Just saying.
Ответить
Thank you!! This helps a TON!
Ответить
Brilliant, thats very impressive, top notch. Thanks
Ответить
Bruh I can’t get on, I done spent two hours,
Edit I got it on after pulling it over the tensioner last it squeaks a bit but it’s on atm.

2011 CRV needs a 1745mm belt. Huge pain to do the install for me. Took about 2 hrs total. When installing the belt, you still pull forward (to the front of the car) . For whatever reason I had in my mind you needed to push the tensioner backwards towards the rear of the car. Not really intuitive to me, so the tensioner bolt loosened. I puzzled over that for a minute until I realized my mistake.
$46 for the belt. Got a Dayco 1745mm 7 rib. Borrowed their serpentine belt wrench as well from Advance Auto, but not enough space to use it. Box wrench and breaker bar, like in the video was best. Pull the plastic shroud off that sits at the front of the engine compartment to get another inch of clearance. You'll need it. Super tight fit. And use a helper. Couldn't do it myself.

note
i was not able to get it the belt on with a small box end wrench that comes in the sets... If you buy the extended open in box wrench set with a few extra inches, thats a game changer!!! can do it by yourself no problems!!! was able to do it in 2 mins!!! 26$ for a set at harbor freight! (( spent more time running around finding the extended box wrench, then it took to do this job!))

You should know Harbor freight has auto tools like this so that way you could easily replace your belt
Ответить
Very clear video. Great camera work despite only having 2 hands.
Ответить
Love how the numbers on the diagram are 666 ... have fun
Ответить
Thanks! Great video!
Ответить
Thanks for the video. Did this today. Pain in the butt, but your tips were very helpful. Thank you so much.
Ответить
you know it's going to be a pain in the ass when the page is listed as 6-66
Ответить
Thank you! Your good advice is still doing good!
Ответить
Awesome. Excellent job. Thank you for sharing so many time and sanity saving tips and tricks. Engineers ain’t got sh!t on you!!
Ответить
Thank you so much Budget Mechanic I did exactly what you said it work like a Charm and it was my first time and I’m not a a mechanic just a average Joe you saved my day
Ответить
Tie strap? Wtf planet are you from?
Ответить
youre a genius with the 1/2 inch ratchet coupled to the 14mm open end wrench. ive not ever seen that im 18 years in the business.
Ответить
Great video, I wish all were as good.
Ответить
That diagram is from the devil 😈
Ответить
Cada cuantos millas hay que cambiar?
Ответить
I just finished my belt. Argued with using a specific belt wrench but after 2 hours I got nowhere. Thought I'd give the 2 wrench method a last try. 5 mins later done. You saved me on a very important day
Ответить
Robert, Thank you. You saved me today. I had a serpentine belt tool from HF but just couldn't get it into a position on the tensioner pulley where I could pull on it. The wrench/ratchet combo worked like a charm!
Ответить
Excellent video!!👍
Ответить
Your not 2011 86 that krap
Ответить
Awesome video. Even women and children could do this job now!!
Ответить
Thank you very much! I think you channeled Bob Ross for this one
Ответить
Thank you!
Ответить
Great video but if I can make a suggestion. I removed power steering reservoir and the bracket (2 10mm) the other huge suggestion is go over the top power steering pulley if by yourself. The alternator pulley was damn near impossible. Top power steering was a breeze.
Ответить


